Sky Writer
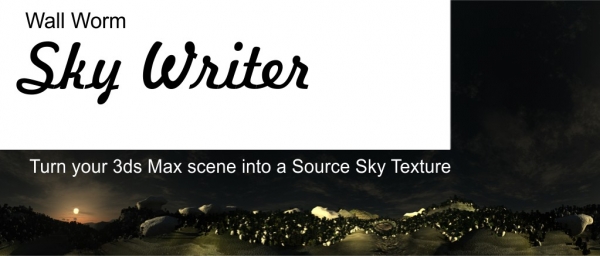 Wall Worm Sky Writer is a MaxScript tool to Render 3D scenes into 2D HDR Sky Textures from 3ds Max 2008+ to the Valve Source Game Engine. (It may work in older versions of 3ds Max with AVG installed.)
Key Features
- Render images needed to create Source sky textures
- No rotating of images needed
- Creates all 6 individual textures (up, down, left, right, front and back) in TGA format
- Creates all 6 individual textures in PFM format.
- Also creates a single HDR cube cross that you can alternatively use in HDR Workshop
- Automatically compile 6 pieces into Source Sky VTFs
- Works in all Source Mods... even Left for Dead
- Integrates with the Anvil
Using Sky Writer
The documentation here is limited as the tool is still under development. Please remember to share your feedback in the forums. It is strongly recommended that you also read the 3ds Max docs on Gamma & LUT and Exposure Control for getting the best HDR output.
Loading the Sky Writer UI
You can access Sky Writer in your Max Menu Bar under Wall Worm > Wall Worm Materials > Sky Writer.
General Usage
The general usage of the tool follows:
- You design an environment to be used for the sky
- Open Sky Writer
- Place a Sky Writer Helper in the scene
- Move the helper to the central location from which your scene should be rendered
- Enter a name for your sky
- Choose a resolution for each sky piece (default is 1024x1024)
- Render the sky
- Compile the sky into Source
Legend
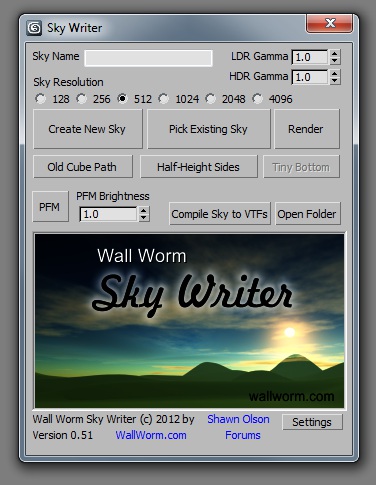
- Sky Name
-
Enter the name of your sky. The tool enforces some rules to make sure your sky is named correctly by replacing the period (.), slash (/) and space into underscores.
- Do not add "_hdr" to the end... Sky Writer already does this for you... as this is an HDR exporter.
- You should check to see if the name is already in use by your mod... as the tool will overwrite anything in your material source skybox directory that matches this. (Though the Source Vtex texture compiler will not overwrite files aleady in the target mod's actual skybox directory.)
- Gamma (Added in Version 0.12)
-
This is the default gamma of the output bitmaps. Please note that you should read more about Exposure Control and the Gamma & LUT settings for 3ds Max in the 3ds Max documentation as well as how Bitmap Gamma works.
By default, the gamma is set to 1.0 for new Sky Writer Helpers unless your exposure control is set to mr Photographic Exposure Control. For mr Photographic Exposure Control, the default is set to 2.2.
- Changing the exposure control after you open Sky Writer does not change the gamma in the UI. Sky Writer makes its default value for new Sky Writer Helpers based off of exposure settings only when Sky Writer is opened.
- Sky Resolution
-
Choose the size (squared) of each sky face. The possible choices are 128, 256, 512, 1024, 2048, 4096. The default is 1024.
- There will be 6 images that are a square image of this dimension (e.g. 1024x1024)
- Create New Sky
-
 Click here to create a new Sky Writer Helper. This object store the information for your sky. It also indicates the position from which your sky renders will happen.
 - Pick Existing Sky
-
When you press this button, you can then pick an existing Sky Writer Helper to prefill the UI with that helper's details.
- OCP (Old Cube Path)
-
This is an option for compiling your textures in Mod's that aren't expecting 6 separate images by default (for example, Left 4 Dead). For most current mods, you should not choose this option!
- At this moment, the only mods known to need this option are Left 4 Dead. Choosing this option for many mods will cause the compile to fail.
- If you are creating content for Left 4 Dead, you will also need to make sure that the Game Info Dir is set in the settings floater. (Set it to the location of your left4dead mod where gameinfo.txt is located.)
- Render Sky Maps
-
Click this button to render out the sky maps. The process may take a while depending on the scene and the resolution of the output images.
The process will create 7 HDR 32-bit TGA Bitmaps in your sdk_content > materials > skybox folder:
- yourSkyName_hdrup.tga
- yourSkyName_hdrdn.tga
- yourSkyName_hdrlf.tga
- yourSkyName_hdrrt.tga
- yourSkyName_hdrbk.tga
- yourSkyName_hdrrt.tga
- yourSkyName_hdr.tga*
*yourSkyName_hdr.tga is a large image that is a traditional 4x3 cube cross of your image. This is here in case you want to tweak the output in HDR Workshop.
- Sky Writer will not let you compile the images if your Exposure Control is set to Automatic Exposure Control or Linear Exposure Control.
- For best results, you should turn on Gamma and LUT in Preferences if you are using the mr Photographic Exposure Control. Make sure to read the 3ds Max Docs on properly setting this up.
- For best results, you should turn off Gamma and LUT in Preferences if you are using the Logarithmic Exposure Control.
- The Render Sky Maps do not compile into VTFs. You must click Compile Sky to do that. If you want to edit the cube cross in HDR Workshop, you can click the Open button to open the Bitmap output folder.
- Sky
-
This option controls the shader to use. When checked, the output materials will be a Sky shader. When unchecked, it will be UnlitGeneric. Some games (like CS:GO) will only work properly with the UnlitGeneric shader.
- Compile Sky
-
Once you have rendered the sky, you can compile them straight into Source by clicking the Compile Sky.
- Note that the intent was have the compile process all six sides of the sky without input... but it appears that the Vtex.exe command to do that doesn't actually work. So in the Vtex console, you will need to hit a key after each image is processed to continue onto the next.
- If you haven't properly set up the Material Source in the settings, the compile will fail.
- Steam must be running to compile.
- If you see an error about -oldcubepath, please read about the Old Cube Path button.
- Open
-
Clicking this button will open the skybox folder in your material source folder of your SDK Content (if you've properly set the path in the settings).
- Settings
-
This button opens the settings floater for Sky Writer where you can set the Bin Dir, Material Root Path and Game Info Directory.
- The settings for Sky Writer are shared with Wall Worm Model Tools. Changing a path in one tool will change it in the other.
Latest Articles
Your 2D Sky and Sky Writer

Overview of setting up a scene in 3ds Max to render out as a 2D sky for your level with Sky Writer.
Getting Started with your Sky
Getting started with your level with the intent of building both a 2D sky and 3D Skybox.
Making Your Sky
Series on making your 2D Sky and 3D Skybox in 3ds Max for the Source Engine.
