Wall Worm Toolbars
In Wall Worm 3.897+ there are now new icons and toolbars available to 3ds Max 2017+. The icons were only made for the new format introduced in 3ds Max 2017 so older versions of Max do not have these toolbars. See troubleshooting for getting the icons to work in 2017/2018.
Level Design Toolbar

This toolbar includes functions that are common to level design tasks and replicate a few functions/buttons found in Hammer. These buttons are for working with brushes, entities and displacements.
Brush Toolbar

This toolbar will allow you to create brushes. Several of the objects, when created with this toolbar, will apply the current material in the material editor as long as that material does not have the For Model option or uses the VertexLitGeneric shader parameter. The first three items are available to all users. The remainder are available if you have Wall Worm Pro Pack or have acquired Arch, CorVex and ShellVex.
Compile Toolbar
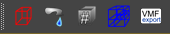
This toolbar is for tools common in compiling a level or troubleshooting a level export. Here you can load the cordon manager, load a leak file, find brushes by their IDs, load portal (.PRT) files and compile a level into Source.
Grid and Nudge Toolbar

This toolbar allow you to manipulate grid spacing, create custom grids, visualize object dimensions, visualize vertices off the grid and more.
Model Tools Toolbar

This toolbar contains functions for working with WWMT Helpers inside Max. Functions include launching the WWMT Floater, Isolating WWMT parts, launching WWMT utilities like Hull Helper, Bone Tools, Bodygroups and LOD managers and more.
Hull Helper Toolbar

This toolbar is for creating hulls from objects or sub-object selections.
Troubleshooting
As noted above, the toolbars were only made for 3ds Max 2017+. The icons will not appear in older versions of 3ds Max.
Missing Toolbars
When you first install WW, the toolbars will all be bunched up in the main toolbar (usually overlapping each other on the far top right of the Max window). You can grab the small vertical line on the left side of each toolbar to drag it to your desired location in the UI. Toolbars can be docked both vertically and horizontally and may also float (like on a second monitor).
Missing Icons
The icons will work out-of-the-box in 3ds Max 2019+. However, to get the icons to work in 2017/2018, you need to take some special steps. There are two options:
Automatic Method
To use the Automatic Method, you need to have Wall Worm 3.899+ and then take these steps:
- Right-Click your 3ds Max launch icon
- Choose Run as Administrator
- When Max launches, check to see if the icons appeared in the toolbars.
- If not, then click F11 and paste this macroscript line into the MAXScript Listener: macros.run "wallworm.com" "WallWormInstallIcons"
- Press ENTER
Manual Method
With the manual method, you need to manually copy some icon files.
- In 3ds Max, click F11 to load the MAXScript listener
- Type: GetDir #userIcons
- Hit ENTER
- Note the path that it returns and browse to that path in Windows Explorer
- Open the Light Folder
- Copy the WallWorm
- Browse to C:\Program Files\Autodesk\3ds Max 2018\UI_ln\Icons (or 2017)
- Click on the Light Folder and paste the WallWorm folder from above
- Do the same for the Dark folder
- In the MAXScript listener again type: colorman.reInitIcons()
- Press ENTER
- Related Topics


