Understanding Wall Worm Displacements
Wall Worm has three basic objects that control displacements. Understanding these objects is important in effectively using WW to create your landscape.
The three objects WW creates are:
- Displacement Meshes
- Brush Face Meshes
- Sculpt Meshes
Each time you create a Displacement with Anvil, you will always be creating a linked pair that includes a Displacement Mesh and Brush Face Mesh. Normally, the Displacement mesh is the one that you see immediately and the Brush Face Mesh is hidden.
- Deleting either one of these two objects will immediately delete the other!
The displacement mesh is a special Editable Poly object that can be edited with various tools in Max; the best toolset for sculpting displacements is probably the Graphite Modeling Tools in later versions of Max. You can edit the displacement with Push/Pull, Relax and other tools. You can also manipulate at different sub-object levels like Vertex, Face, etc.
Generally speaking, you should not move a Displacement mesh. Instead, you should move the brush face mesh. You can get the displacement's brush face by clicking the Move Mode in the modify tab of the command panel, or click Move Mode in Anvil.
- The Displacement mesh is a child of the Brush in Max... so moving the brush will automatically move the displacement. But the reverse is not true.
You should never edit the brush face mesh in any way whatsoever except to change its position in the scene. You can also rotate it, but rotation is not recommended. Do not scale the brush mesh or move any of its vertices!
The Sculpt Mesh
If your scene is composed of multiple displacements, you can consider using a Sculpt Mesh. Sculpt meshes are special editable poly objects that are generated from the surface of a collection of displacements where the vertices of the sculpt mesh are mapped to the original displacement vertices.
To create a sculpt mesh, select some displacements in the scene. Then, in Anvil, click the Sculpt button in the Displacement Tab. WW will create the sculpt mesh as well as hide and lock the underlying displacements and brushes.
- Depending on how many displacements are used, what power those displacements are and how fast your computer is, it could take a second to several minutes to create the sculpt mesh.
Once generated, you can now sculpt as you would a single displacement, but you can now treat the collection of displacements as a single object. This has many benefits, especially when using tools like Relax, etc.
The underlying displacements do not get updated until you click the Commit button in the modify tab of the command panel when you have the displacement sculpt mesh selected.
In earlier versions of WW, there could only be one sculpt mesh in the scene at a time and it needed to be destroyed before exporting. That is no longer the case. You can now have any number of sculpt meshes, and they never need to be destroyed; the only thing you have to remember is that each sculpt mesh needs to be commited for any changes applied to it are extended to the underlying displacements.
Examples
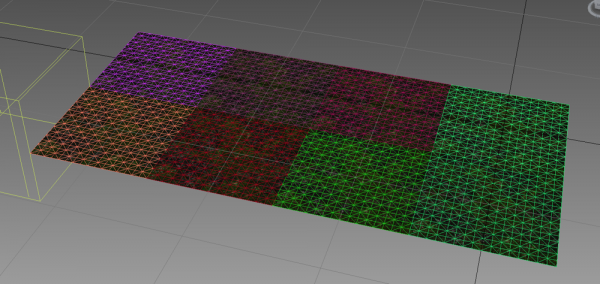
Below, eight (8) displacement pieces are created with Anvil.
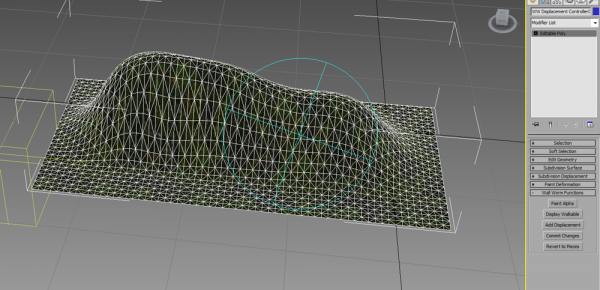
Below, the displacements have been converted into a sculpt mesh and sculpted with the Push/Pull Tool.
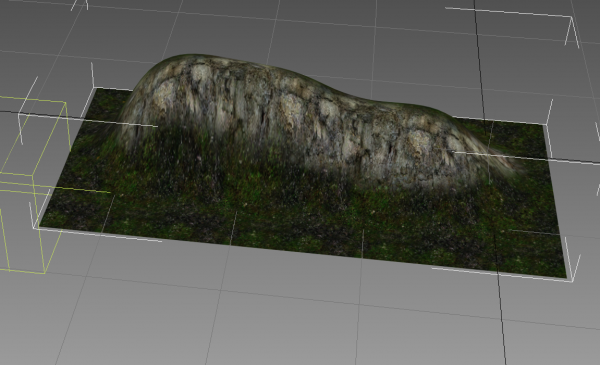
Below the alpha blend has been applied.
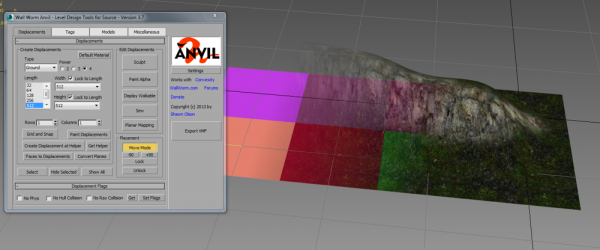
Below the sculpt mesh has been reverted back into its constituent displacement peices. The Move Mode in Anvil was pressed to hide this displacements and allow movement. (The image is a composite of Move Mode and non-Move Mode so that you can see the relationship of a displacement and the brush face mesh.)
Important Rules
There are some rules you must follow to successfully work with Wall Worm Displacements.
- Never add or delete vertices or faces in any Displacement object.
- Never do anything that changes the order or faces, vertices or orders of vertices inside faces.
- The Graphite Toolbar function to Quadrify the mesh is no longer supported. Using it on Displacements, Sculpt Meshes or Brush Face Meshes will invalidate the Displacement. (The goal is to bring back support for that, but at this time do not use it.)
- Because displacements no longer support Quads they miss some important loop selection tools. You can get back loop selection with the Heuristic Edge Selection macroscript by Swordslayer. The comments section includes a modified Macroscript by Wall Worm to add loops selection to the vertex level.
- Related Topics
